Writing Rich-Text Content to Cloud Firestore With Tiptap and Nuxt

Photo by NeONBRAND on Unsplash
Writing to Cloud Firestore is just as easy as reading from it. But what if you want to save data directly from your Nuxt application to cloud Firestore? What if you wanted to save rich-text content?
tiptap
There are a number of rich-text editors out there and the one that I've selected for my website was tiptap mainly because it's built precisely for Vue.js, it's fully extendable and is renderless. In addition, the documentation and examples are clear, which just makes using it all the more pleasant.
Writing the content into Cloud Firestore
As mentioned earlier, writing into Firestore is just as easy as reading from it. The documentation and examples from the Firebase team are an excellent source for information so I'll just be providing some brief examples here.
When creating a new document, you have the option to provide your own unique ID or let Firestore automatically generate one for you.
Writing a document
The basic code for creating or overwriting a document is:
const data = {
  title: 'Writing Rich-Text Content to Cloud Firestore With Tiptap and Nuxt',
  body: '<p>tiptap is a renderless rich-text editor for Vue.js</p>'
}

const id = 'writing-rich-text-content-firestore-tiptap-nuxt';

db.collection('blogs').doc(id).set(data)
In the example above, we are writing a new document with the ID writing-rich-text-content-firestore-tiptap-nuxt. If a document with that ID already exists, it will be overwritten.
To let Firestore generate the ID for you, simply use the add method instead:
const docRef = await db.collection('blogs').add(data)

console.log('New document ID', docRef.id)
Updating an existing document
If you simply want to update certain fields of an existing document, you can use the update method.
const docRef = db.collection('blogs').id('writing-rich-text-content-firestore-tiptap-nuxt')

docRef.update({
  title: 'Writing Rich-Text Content to Cloud Firestore With Tiptap and Nuxt'
})
You'll also most likely find a need to check if a document exists or not. You can do that by getting the document snapshot of the reference and using the exists property:
const snapshot = await db.collection('blogs').id('writing-rich-text-content-firestore-tiptap-nuxt').get()

if (snapshot.exists) {
  console.log('Document exists')
}
Putting it all together
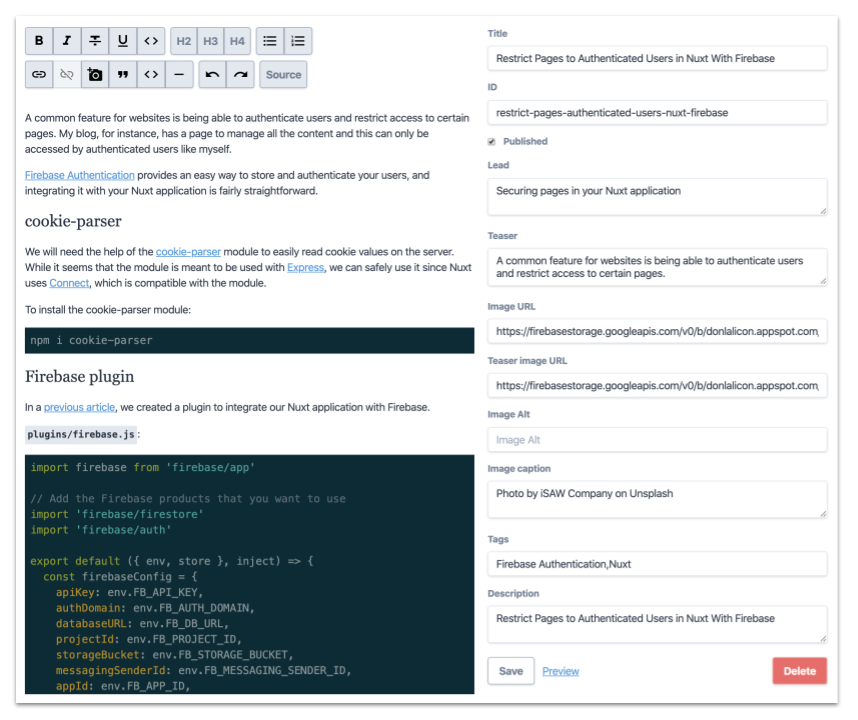
I wanted the bare minimum experience for writing online; The experience didn't have to be medium-like but it still had to be bearable especially since I'll be spending a lot of time here. I wanted a WYSIWYG editor and also wanted to be able to set the title, description, and other properties of the blog in one form.
Below is a screenshot of the editor that I've implemented for my blog. Being able to see how the article will look like is an important feature of any rich-text content editor and tiptap certainly delivers on that regard.
You can check how I'm using tiptap for my blog and what customisations I've made from the source.
The components
Icon components
For the editor menubar icons, I decided to use Material Design Icons. I downloaded the SVG versions of the icons that I needed and converted them into Vue components. Of course, directly including the Material Design Icons font works but I opted with just using what I needed.
You can see all the icon components used for the editor menubar from the repo.
Editor component
The editor component wraps the tiptap editor and contains some customisations. You can view the full source code of this component from the repo.
The implementation is pretty straightforward and follows closely tiptap's basic examples. Something that's important to note, especially since we're using Nuxt, is how we initialise the editor. Instead of initialising the editor in the data property, we do it on the mounted event. This is because the mounted event also runs on the server-side and tiptap needs access to the document object, which server-side rendering doesn't have.
Another thing that you may have noticed in the code is that we've implemented some custom commands for inserting images and links.
It's obvious that there's a fair work for setting up tiptap but in exchange you get lots of control over almost every aspect of the editor, from its look and feel, to custom commands.
Blog form component
This is where we do a lot of the heavy-lifting. This is where we add the editor component as well as allow other blog fields to be edited. This is also where we save and delete our document in Firestore.
You can view the full source code of this component from the repo.
The pages
With the blog form component, it was easy to create the pages where I can create and edit blogs with very minimal code duplication. You can view the source code for both pages from the repo.
Final words
Both Firestore and tiptap offered plenty of documentation and examples to work with, which made the developer experience a great one. Implementing both into my website was both fun and informative. If you'll ever need a rich-text content editor for your next Nuxt website, I highly recommend tiptap.